When you have a blog or a website and you want to grow its audience, there are many ways to do it.
But if you would like to see quick results, I would like to recommend you three easy and actionable steps you can do right now to start building and growing a community around your website today.
The best part of it: Zero budget is needed!
Let’s dive into it.
-1.png)
Step #1: Install SumoMe
SumoMe is a free toolset for your website that will enhance the user experience on your site and it includes powerful tools to grow your traffic, get more email subscribers and more.
-1.png)
Here, on Bootstrapious, I have been using SumoMe since the day 0 and, without hesitation, I can say that their free tools helped me to build my audience a lot.
Installation of SumoMe is quick and easy.
- Visit SumoMe website
- Enter your website's URL
- Paste one line of JavaScript code to your website’s HTML.
If you are using Wordpress to run your site, they have a Wordpress plugin to make it even easier for you. (As Bootstrapious is not running on Wordpress, I don’t have experience with it, though.)
In the next steps, I will show you, how to do the magic with SumoMe to grow your audience.
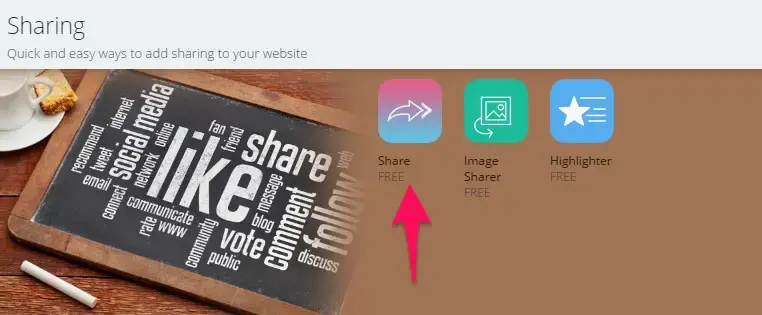
Step #2: Give your visitors a convenient way to share your great content
-1.png)
More than 20% of Bootstrapious’ traffic comes from the social network shares.
The least you could do to make your content shareable is to make it as easy as possible for your users to share it.
The great way to achieve that is by installing the SumoMe Share plugin.
Install it by following these simple and quick steps:
- Log in your SumoMe account at your website
- Navigate to Store
- Scroll down to Share plugin tile
- Install it by clicking the "FREE" button
When installed, the result will look as shown in the next picture:
![]()
When you install it on your website, you have everything set and you are ready to go.
Settings
There really many options in the Share settings, so I will only mention the most important ones and also what works best for me.
Appearance
On Bootstrapious, the social buttons appear on the left side when viewed on the desktop and move to the bottom of the screen when viewed on devices with viewport with smaller than 900 px.
For further reading on the share buttons ideal placement, see this great case study on social media buttons.
-1.png)
Services
Not to flood the user with too many options to choose from, I display only sharing buttons for the services that bring me the most traffic: Facebook, G+, Twitter, Pinterest, LinkedIn, Pocket and Buffer.
I let SumoMe order them for me to achieve the most shares and I also display the number of shares (“social proof”).
-1.png)
Seeing the results
That’s it.
Let it run for few days, log in to your SumoMe dashboard on your website and check the stats.
You will see a nice chart and with a bit of luck also the numbers that will please you.
To give you an idea, how the dashboard can look like, this is the dashboard for last 30 days on Bootstrapious:
-1.png)
Pro Tip 1: To further boost your social shares, give a try to these free SumoMe tools: Highlighter (Highlighter makes it dead easy for your visitors to highlight and share any part of your articles. ) and Image Sharer (Lets your readers to auto-magically share the images on your site and link back to you).
Pro Tip 2: Enable UTM tracking for further analysis of the social shares in Google Analytics.
Pro Tip 3: Go to "Share > Services" and enter your Twitter username in order to have a Tweet appendix like "via @bootstrapious" added to every Twitter share from your site.
Step #3: Grow your email list
-1.png)
Without a doubt, email is a great way to communicate with your audience on a more personal level and if you have an email list, you will always have a way to communicate with your readers. You can share the new stuff you are up to, your new blog post coming out, or announce your new products or tutorials.
‘Out of all of the channels I tested as a marketer, email continually outperforms most of them’ - Neil Patel.
More on the importance of building your email list at Campaign Monitor Blog.
Let’s get started
One of the most common, yet hardly effective at all, ways to ask for your readers’ emails is an opt-in form lost somewhere in your site’s footer.
Yes, I have one of them on Bootstrapious too. :)
Does it work? I would like to say yes, but not really…
Now, I would like to show you a more clever way to engage with your audience and ask them for their email.
We will need again one of the free SumoMe tools - List Builder.
Install List Builder on your site:
- Visit Store in your SumoMe panel
- Scroll down to the List Builder tile and click it
- Install it by clicking the "FREE" button

How does it work?
The idea behind the List builder is pretty simple.
Based on your settings, e.g. when the user decides to leave your site, a custom lightbox is shown to that particular user.
The lightbox can contain a custom heading, message, and a simple form where the user can enter his/her email to become a member of your email list.
One of the lightboxes I am using here on Bootstrapious looks like this:
-1.png)
Main features
List builder is again packed with features, so again I will mention only the most important ones from my perspective.
Behavior
I am not a big fan of the aggressive popups you can see on many websites today.
So, in most cases, I use the “Smart behavior” option to display the popup window. This behavior is also sometimes called an exit intent and it means that the popup will be shown only to the user deciding to leave your website, i.e. after scrolling up to the address bar of the browser.
So far, it has been working pretty well and I haven’t had any negative feedback on it.
The only exceptions are the pages where I offer an upgrade to the existing blog post content. In this case, I trigger the popup window after 10 seconds of reading the blog post.
Content
You can easily customize the messages that will be shown to the users. You can also change the size of the window (device responsivity included), colors, font to match with your overall website appearance, and much more.
Integration
If you are just getting started with email marketing, you can easily export the emails in a good old CSV.
For a more advanced approach, the List builder offers more than 20 built-in integrations. Therefore, you can connect List builder to e.g. Mailchimp, Campaign Monitor, GetResponse, and others.
-1.png)
If you are one of the rarer cases, and you use one of the services not listed at the moment, try integrating it via Zapier which will serve as a connection point between the SumoMe and your app. This worked pretty well for me while integrating SumoMe with my emailing solution - Sendy.
Seeing the results
The results of your List Builder campaign will be presented in a neat chart and table right in your admin section of SumoMe.
Again, to give you an idea, how the dashboard looks like - see Bootstrapious’ List Builder campaign results in the last 30 days.
-1.png)
Pro Tip 1: Consider using content upgrades or bonus content that will be available only to email subscribers as an incentive for your readers to sign up to your email list. The subscription rate can double or triple easily compared to the conventional popup.
Pro Tip 2: After upgrading to List Builder Pro, you can choose from 40+ pre-styled popup templates. Many of them contain a space for an image.
Pro Tip 3: To continuously improve your results, incorporate A/B testing to find which colors, text and visual works best for you.
Now, It's Your Time To Shine
-1.png)
Okay, I’m done.
That’s it from me for today and now it’s time for you to go out there and start growing your own blog and website.
Don’t forget to let me know in the comments how it went!
If you have any troubles starting, let me know in the comments section too, I will try to help.